

I have made this style of scarf several times for gifts using a combination of voile and shot cotton. In the past, everything went smoothly. This scarf, my scarf, I've been working for a week. This simple rectangle brought me to tears sewing it, or more specifically ripping it out again and again. It's humbling when things aren't as easy as you thought they would be, or as easy as it seems for everyone else.

When I searched the web looking for tips I felt like everyone got it but me. The voile was so slippery against the velveteen, I could not get it to stay where I wanted it no matter how many pins or clips I added. The fifth try (or maybe it was the sixth), I let perfection go and decided that close was good enough. It will be wrapped, scrunched and draped. No one will be able to tell, right?

Well, it was worth it in the end. I think all you see is the beautiful fabrics! Here are some of the things that helped me a little.
**If you have anything else that might help, I would really love to hear and learn for next time.
TIPS:
- Trim both pieces to exactly the same size. Exactly.
- Pin parallel to your seam line, rather than perpendicular.
- Match your pins on either side. If the first pin starts 1" down on the right, add another pin 1" down on the left.
- Adjust the foot pressure to accommodate the voile. Check your manual for setting information.
- Sew with the voile on top and the velveteen on the bottom
- Two words: Walking Foot
INSPIRATION:
This tutorial has been around awhile and there are lots of gorgeous Figure 8 scarves (also called infinity scarves) out there. Here are some of my favorites. Click on the links below to see the original photos.
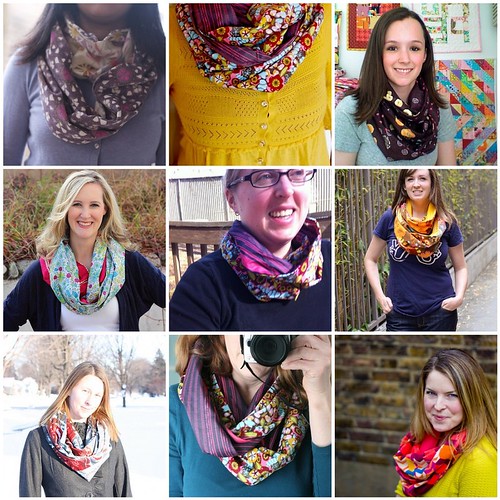
1. round and round, 2. flickr.com/photos/74067014@N00/5189889003/, 3. New Scarf, 4. Infinity Scarf, 5. Figure 8 scarf, 6. figure 8 scarf, 7. scarf, 8. figure 8 scarf, 9. Figure 8 Scarf
LINKS:1. round and round, 2. flickr.com/photos/74067014@N00/5189889003/, 3. New Scarf, 4. Infinity Scarf, 5. Figure 8 scarf, 6. figure 8 scarf, 7. scarf, 8. figure 8 scarf, 9. Figure 8 Scarf
-Figure 8 Scarf Tutorial: http://annamariahorner.blogspot.com/2010/12/figuring-8.html
-Scarf Kits: http://store.annamariahorner.com/envesc.html
-How to Use Pins the Right Way by Threads Magazine
I had a complete nightmare sewing mine, compounded by my decision to cut the kit in half to create 2 scarves (9" wide). I made 4 as gifts but only gave 3 as the fourth was too much the "runt" of the group and now I use it instead. You're right about it being scrunched and round your neck so small "issues" can be hidden. I will make them again, using your tips and having a large glass of wine to hand when it all gets too much x
ReplyDeleteSorry you had such a tough time with it but good for you for letting go of "perfection". It's only a concept anyway. :)
ReplyDeleteWhen sewing unlike fabrics, I try to put the least troublesome and more stable fabric on the bottom so I can keep a close eye on the shifty troublemaker. If you ever do this kind of project in the future, I would recommend you skip pins altogether and try some basting glue inside your seam allowance, and widen your seam allowance to a ⅓ - ½" to give you some fudge room. Mine weren't perfect and I was using voile for both sides, let alone two different fabrics...
Steam-a-seam lite tames the most ill-behaved fabrics. I place it just barely inside the seam line, finger press it (no ironing uless you want it to be permanently bonded), and sew. No pins, no shifting. Like a miracle. After the seam is sewn just gently pull the steam-a-seam off. In quilt shops it comes in sheets but in general fabric stores you can buy it in a 1/4 inch roll.
ReplyDeleteOh, it's beautiful!! Thanks for sharing your tips. This is something I'd like to try.
ReplyDeleteI made a couple of these last Christmas. I agree with you- they weren't as easy as they looked. I switched to my walking foot fairly quickly, so I didn't do much tearing out. I loved wearing mine all winter. Boy, is that velveteen warm! I'm glad I made one just from voile and I can still wear it through the spring.
ReplyDeleteWell, it certainly looks gorgeous. I love the colour combination. I remember reading of someone else having a lot of trouble with it too - cant remember who, but it was someone who does amazing sewing, so you're not alone!
ReplyDeleteI had the same issues with a recent project involving velveteen and voile! :( no tips to help though, sorry!
ReplyDeleteYou look beautiful in it Adrianne! You made it through it and mistakes are hidden as you have said;)
ReplyDeleteYou have me interested in making one. A couple of your "comments" gave some great tips such as using steam a seam or basting glue.
Sorry you had such a rough time with the scarf, but it does look gorgeous! The tips above look pretty intriguing. Definitely worth a try.
ReplyDeleteI finished a scarf for my daughter this week and also encountered some frustrating moments. I followed your directions to the letter but ended up with a mess on the second seam. Then I took the whole thing apart and repinned both horizontally and vertically. At this point I also realized I had not checked the direction of the nap of the velveteen in my first sewing attempt. The second time I made sure to sew in the direction of the nap and had a good result. I finished by sewing the velveteen seam on the machine and the voile seam by hand to join the ends. Although I paid no attention when sewing the ends together the motifs on both sides lined up perfectly. Whew! Hope my daughter likes it as she has no idea I was making this for her.
ReplyDelete