Thursday, May 31, 2012

Kona Challenge: My Modern Peel Quilt is Finished!!!


Almost a year later to-the-day... I finished my Modern Peel Quilt. Happy Dance! 


Kona Bright Charm Packs from Robert Kaufman


It started with one Kona Bright Charm Pack and a quick sketch made at a stop light. I wanted to take one of my all time favorite traditional quilt blocks and tweak it.  


I re-imagined an orange peel block bold and graphic. I wanted to play with the scale, separate the peels and then bring them back together with the quilting. The top went together quickly. It was fun appliqueing all of the peels down and playing with the color placement. And then it came time to quilt it.


Spiral quilting


Ugh the quilting. Talk about biting off more than you can chew. Wow. The quilting turned out to be so challenging. I found myself stuck in between an awesome idea and my own humble abilities. I did not choose, a meandering stipple, organic lines, bubble quilting, all over swirls, random rings... no, I envisioned all over interlocking spirals. 

The problems came from the fabric being pulled in all different directions and handling the quilt over and over for each spiral. There was a ton of pleating, folding and buckling. It was awful. I should have saved myself and just stopped. I didn't. I cannot even tell you how many times I unpicked the quilting and started over, got frustrated, and put it away. Ok, it was at least five.


I was happy to have it stay on the shelf indefinitely. It was a quilting mojo killer. We needed time apart.


Every once in awhile someone would ask me... whatever happened to that cool quilt you started? Then I would feel a little guilty and rattle off an excuse and then change the subject.


Lame.


Fast forward to April of this year, my guild mates decided they were going to enter their (finished) Kona Challenge quilts into the local fair. They wanted mine to be included. Determined not to let them down, I decided to try the quilting again. I received some really great advice from my friends on different ways to attack the problem areas and lots of support and encouragement to keep going. They are the best!


Quilting is happening at my house!

Armed with a stubborn streak, a brand new sewing machine, a seam ripper, starch, steam, a walking foot, and lots of determination, I made it through and I finished it. Phew.


If you're in the Bay Area, please check out our special exhibit at the San Mateo County Fair featuring our Kona Challenge Quilts. For our challenge, we made quilts out of Kona charm packs sent to us by Robert Kaufman. The parameters of the challenge were to feature the Kona charms, use only solids, and make at least a baby sized quilt.


If you aren't local, let your fingers do the walking! Here are some of the other quilts made by members of the Bay Area Modern Quilt Guild


Ruth
Tamiko
Colleen
Angela
Claudia
Jaye


My East Bay friends participated too!


Dan
Joel
Sharona
Margaret


Even more modern quilters participated in this challenge and you can see most of the entries in the MQG Robert Kaufman Kona Solids Challenge Quilts flickr group. What would you make with 43, 5" squares of color?  : )

Tuesday, May 22, 2012

Quilt Market: Slideshow


Photographs first, thoughts later... View the slide show here on the blog, or click over to my flickr page to view the photos individually. As I write this I am not done uploading all of them, but the slideshow will automatically show you the most current view. Enjoy!!  

xx Adrianne

Saturday, May 19, 2012

Quilt Market: Goodbye Echino

I loved all the new Echino fabric in the Seven Islands booth!!  Zebras? Framed Owls? Stags with glasses?! They are all so great!  I can't wait until July.


Friday, May 18, 2012

Quilt Market: Sample Spree

I think they should hand out little buttons for you to wear wear as you exit. Or maybe a stamp right in the middle of  your dazed and confused forehead.


Seriously, you stand in line for hours, your rush into the sample spree room, you crowd around the tables, try to get your hand on a bundle you want, plant your feet firmly while you try to stay in one place and pay before you get pushed back out into the isle, move through the crowd to the next table, and do it all over again. You think you have a game plan? Check it at the door. It's every quilter for themselves one your cross the threshold. The madness is every bit as real and as crazy as they say. Why, why do we do it?

For the love of fabric dude!!!

3 hours of waiting, 3 bundles of fabric. I'm totally ok with that. Hello Bella! #quiltmarket
Bella by Lotta Jansdotter, Good Life by Deena Rutter and Seaside by October Afternoon

Here's my haul this time. Three hours of waiting in line and three bundles of fabric. Totally worth it!!  : D

Today the market floor officially opens in an hour and a half and I can't wait to see the booths.  Keep an eye on twitter/flickr if your interested. I've got my phone charged and ready!

xx A


Wednesday, May 16, 2012

Quilt Market: Kansas City Here I Come!

I've got my new...

Wheeee! A little bluebell bag. : )

Little Bluebell Bag,

Fancy Birdie

and a new Birdie Sling,

and I'm off to Quilt Market in Kansas City.  If you'd like to follow along, I'll be posting on flickr and twitter while I'm there.  I'm hoping to squeeze in a blog post too.  If there is anything that you want to see, send me a tweet!  I hear Denyse Schmidt will have her first booth and I'm hoping to see the new Nursery Versery by Heather Ross.

If you want to follow everything that is happening at Quilt Market, search for #quiltmarket on twitter.  Grab a snack first though because I guarantee you'll be there awhile.

PS: For those of you who wanted to see me wearing my new Wiksten tank (you know who you are!) stay tuned.  It's also packed and ready to go.  : )


Monday, May 14, 2012

Pattern Review: Wiksten Tank

Eek! I dipped my toe into garment sewing for myself.  Starting with the popular and beginner friendly pattern, Wiksten Tank by Jenny Gordy. After making two this past weekend I can tell you, it's an easy and satisfying pattern. The Wiksten tank is very well written and includes french seams and bias binding for a polished look. Lots of tanks are popping up on flickr and you can see why!  It looks good in any fabric and has a very flattering shape. Here are some of my favorites:


For my first try, I wanted to use nice fabric, but not precious fabric.  I had just enough of this Farmdale print in my stash.  It went pretty well. The binding on the arm holes is a little fiddly and it went much smoother the second time around. I was glad I practiced first.


Then I took a deep breath and bought some Quilt Blocks by Ellen Luckett Baker from The Intrepid Thread.
I love this print!! It looks pretty good right? 


I was a little shocked at the scraps leftover.  Good thing I quilt!!  ; )

TIPS:
  • Try it on after you sew the first seams, but before you finish it to make sure you like the fit.
  • Pin and then pin some more.
  • I found it easier to cut the bias strips using my quilting ruler and rotary cutter. Measure first!
  • If you have to, you can piece your bias strips. I didn't have enough fabric for the long neck strip so I cut two and pieced them together. After it's finished, you can't tell!
  • Don't own a Pressing Ham? Me either. I used a rolled up hand towel and it worked in a pinch.

MATERIALS:
Pattern: Wiksten Tank by Jenny Gordy (I bought the .pdf version)
Fabric #1: Farmdale Blossoms by Alexander Henry
Fabric #2: Quilt Blocks by Ellen Luckett Baker

Up next... the Tova?!

A pretty apple blossom from my yard.

Sunday, May 13, 2012

Scrappy Pillow Swap and Sudoku

Scrappy Pillow Swap for Bay Area Modern

I used Oh Fransson's Orange Peel quilting tutorial.
We just finished up a swap in my guild called the Scrappy Pillow Swap. Participants brought in bags of scraps and we blindly swapped them.  Each maker turned the scraps into a pillow cover. My partner included some of this great tree print from Modern Meadow by Joel Dewberry. There were also pieces of Buttons by Suzuko Koseki, Pearl Bracelet by Lizzy House, Miscellany by Julia Rothman and Daisy Mae by Denyse Schmidt and Echo by Lotta Jansdotter. An interesting mix!

I knew I wanted to fussy cut the tree somehow. At first glance, the black prints stood out a lot and it was going to be important to either spread them around or make a feature out of them as a binding or a border.  The browns scared me a little. The tree had browns so it would be ok in the end. Right? 

I got stuck on what to do for the longest time and turned to EQ to work it out. After a lot of different ideas and blocks, I decided to go with a simple patchwork. Make the fabrics work it!

My son had been playing Sudoku for the first time that week and I can't help but feel that influenced the design. It's true! The layout is a nine patch within a nine patch. The tree makes up the center of the big nine patch and then I broke down the remaining eight squares into nine patches too. Why? So I could layout the colors Sudoku style!  

It came back to worrying about where the black was going to go. If I made sure it was in a different position in each one it would look balanced and scrappy. Do you see it? Bottom right, top center, bottom left, etc...


Then I added in the brown/taupey color. I really wanted to mix that one in well. One per block please.


Ok, now that I had the foundation down, I could add the rest of the colors.

Layout for the Scrappy Pillow Swap

Isn't it pretty???  I think it would make a good mosaic project. Maybe a framed mirror or something.  Anyway, after all that worrying about the colors, I couldn't imagine this composition without the black and the brown. They look so great all together.

If you are an Eagle Eye, you might be wondering what happened to the light aqua color in the final pillow.  That was something I was going to add from my stash, but I decided not to in the end. It wasn't that I didn't like it, I did, I just wanted to stay true the colors my partner put together.


My partner turned out to be our Vice President, Kathleen! I was so surprised because these aren't colors she's ever used in a project together. She really had me stumped. The best part of all (the part I hold my breath for in every swap I've ever done), will my partner like it?  She did!!!

Friday, May 11, 2012

WINNERS: Aurifil Thread

And the winners of the Aurifil Thread packs are...


I'm sending you all an email. You guys are going to love this thread! Thank you so much Aurifil for sponsoring this giveaway!!

-A

Monday, May 7, 2012

Zakka Style Sew Along: Week 6 - Itty Bitty Quilt Block Magnets

Hi! Welcome to Week 6 of the Zakka Style Sew Along!! If you're new, this Sew Along is the brain child of two friends, Lindsey and Amy. They rounded up a team of bloggers and together we are sewing through the book, Zakka Style by Rashida Coleman-Hale, one project at a time. Oh, and  there are prizes when you finish up a project and link up! You can join anytime.

If you are already following along, are you having fun with your projects? So far I've only managed to make the Zigzag Tote, but I can't wait to make the Orchard Path Tweed Pouch and the Patchwork Pot Holder.

Today I'm going to show you my version of the Itty Bitty Quilt Block Magnets by Nova Flitter from the blog a cuppa and a catchup. I remember when I first saw these cuties pop up on flickr. Nova made a batch for a swap she was in and I was smitten immediately. I mean come on! They are so cute!!


MATERIALS: 
  • Essex (a cotton/linen blend) by Robert Kaufman in Medium Aqua, Sunshine, Carrot, Grey and Hot Pink
  • Cosmo Embroidery Floss by Lecien

I started with one block to test out the pattern and I quickly made two more. They were like chocolate kisses, I couldn't get enough. One thing I cannot overstate. When they say Itty Bitty, they really do mean teeny tiny! The finished size is 1.5" x 1.5". That is shorter than your pinky finger. The best advice I can give to you is to follow the pattern as written. It's laid out very well in the book. Some of the pieces you cut are smaller than 1".  Eep!


My kids were home with me the day I worked on these and they really wanted to help. They are 4 and 6 and it took a minute to figure out their jobs. I printed off some over-sized graph paper so they could color the patterns in.  While they colored, I cut squares of fabric for them to arrange. Then I sewed them together. Both of them were really into it and it was fun to work on it together.

Before you get started on your blocks, I have a few tips to share with you.
Tip #1: Starch is your friend. Seriously. You will be working with itty bitty pieces of linen. If you stretch your pieces even a smidge, it looks like a lot. I used Essex (a cotton/linen blend) and starch and it was still tricky getting things lined up.


Tip #2: Lock those stitches. I popped more than one flipping these right-side out in the final step. If this happens to you too you can mend it with a hidden ladder stitch like I ended up doing. I won't tell! ; )


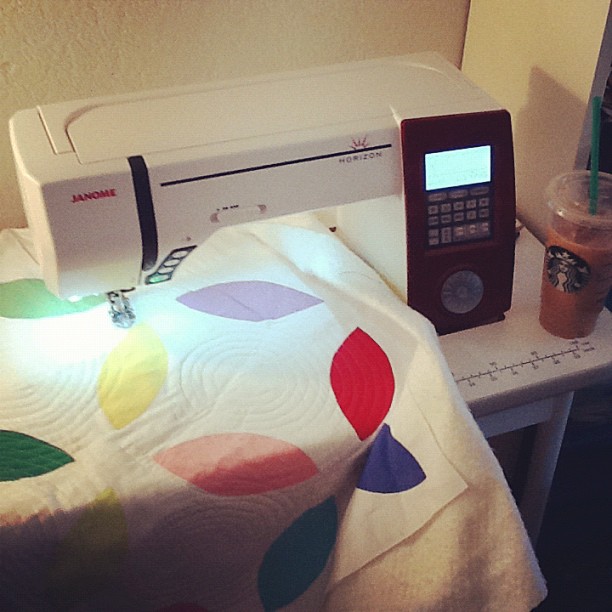
Tip #3: If you make the string block and you use a paper foundation (as recommended in the book) shorten your stitch length. Every machine is a little different. I changed mine from 2.5 to 1.2. This step will make it much easier to tear off your paper pieces. 
Tip #4: This is actually in the book, but I am repeating it. Test you magnet to make sure it works and is facing the right way BEFORE stitching it closed. Before! Ok, I feel better. Now I know you won't sew it backwards like some people I know. Ahem. 


 It's such a sweet little project and useful too. Great for holding up your most important notes. ; )

GIVEAWAY
**This giveaway is now closed. Thank you to everyone who entered!**


Yup, that's not all!  Aurifil generously gave me five packs of thread to giveaway to my readers!!!  Five winners will be randomly selected on Friday, May 11, 2012.  Winners will be contacted by email, so if it is not visible in your profile, please add it to your comment. International entries are welcome.


TO ENTER:
1) Please leave a comment below
2) If you are a follower please leave a second comment.  I love you guys!!!

Thank you so much to Lindsey and Amy for putting together this fun sew along!  And a big THANK YOU to all of the sponsors for making it possible.


LinkWithin

Related Posts Plugin for WordPress, Blogger...