
All seams are 1/4". Strips are cut along the width of fabric, approximately 42" wide. One strip set will make two Double Hourglass blocks.
CUT FABRIC: For each strip set, cut the following:
(1) 2.25" x 42" white strip
(1) 2.25" x 42" color strip
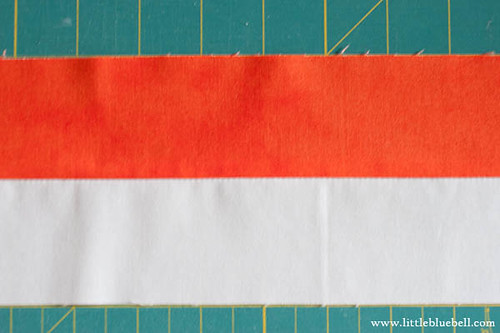
STEP 1: Place two strips right sides together, and sew along the long side. Press. I recommend pressing to the side instead of open for this block. It really helps your points line up.

STEP 2: Find the 45 degree line on your ruler. Place it along the bottom edge of your strip set. Look at the top of your strip set and make sure that the ruler is just past the selvage.
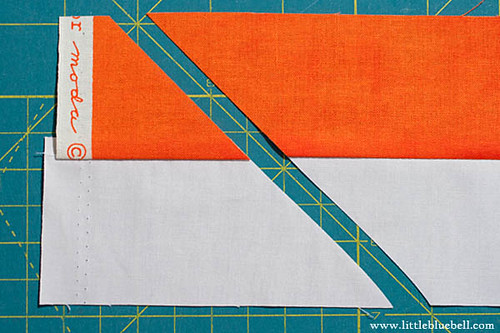
STEP 3: Holding your ruler firmly, make your first cut.

STEP 4: Line up the 45 degree line along the top of your strip set. Make sure it's nice and straight along the length. Line up the bottom of the strip set with the very edge of your ruler. This is the tip of your triangle so take your time to place your ruler just right.
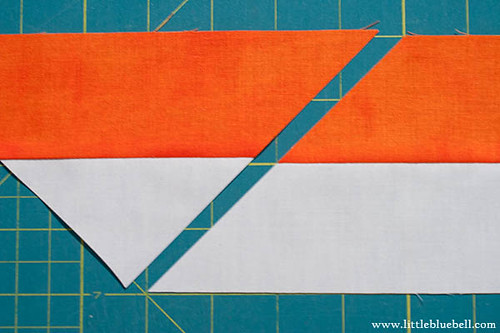
STEP 5: Make your second cut. Now you have a triangle!
STEP 6: Now line up the 45 degree line along the bottom of your strip set. The top of the strip set should just touch the edge of the ruler. This is the tip of your triangle. Cut carefully.
Continue down your strip set, repeating steps 3-5 until you have cut eight triangles.
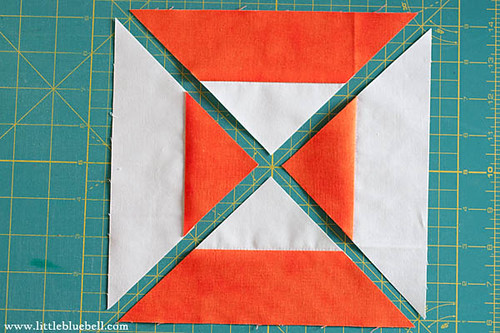
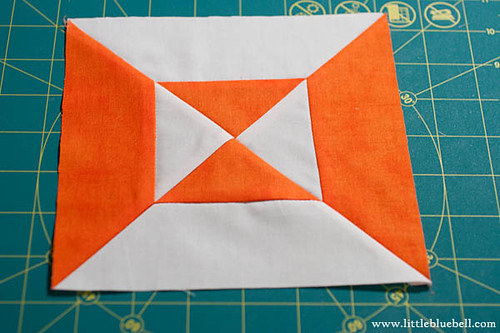
STEP 7: Arrange in the layout shown.
STEP 8: Pair up the triangles and sew them together using a 1/4" seam.
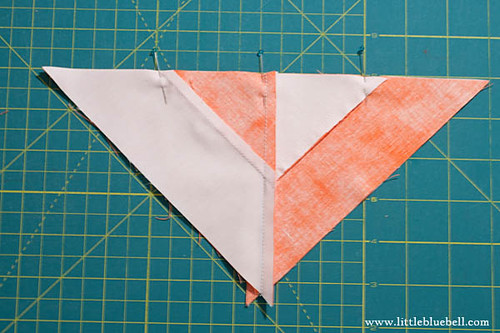
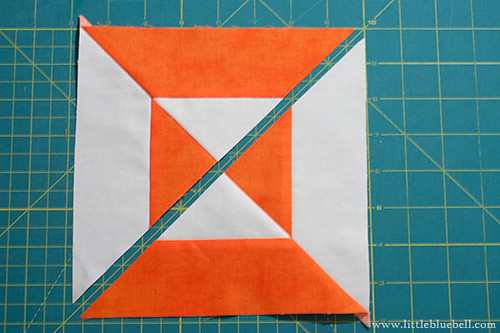
STEP 9: Pin and sew together as shown.
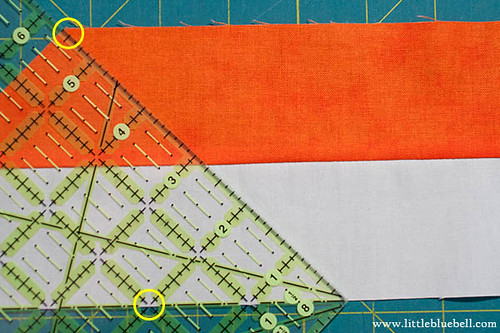
STEP 10: Trim your block to 7" square.
 |
| Printable Version |
This looks great! Going to try it when the kids take a nap today! Thanks!
ReplyDeleteI pinned this, looks so simple!
ReplyDeleteThanks for the great tutorial. This block has been on my list for a while.
ReplyDeleteThanks Adrianne - how simple you made it look!
ReplyDeleteThanks for sharing- I'm so busy right now that quilting seems to have fallen off my list! But thanks for the inspiration anyway!
ReplyDeleteThis is really very simple :) Thanks for the lovely tute.
ReplyDeleteThanks for the great tutorial for a very versatile block Adrianne!
ReplyDeleteIt looks great! Thanks for sharing, Adrianne :)
ReplyDeleteNicely done Adrianne - thanks!
ReplyDeleteCool, thanks for the tute!
ReplyDeleteGreat tutorial. Thanks.
ReplyDeleteMany thanks for the tutorial!
ReplyDeleteVery clever! Thanks Adrianne. :-)
ReplyDeleteTHANK YOU!!! I am adding this to my list of quilt blocks to make this year! I appreciate you sharing it!!!
ReplyDeleteyou made that look sooooo easy! I'm definitely going to try it!
ReplyDeleteThis is a great block and tutorial
ReplyDeleteWhat a fabulous way to make these blocks, thank you!!
ReplyDeleteThis is a fantastic tip!! Wow, thanks for sharing.
ReplyDeleteWhat a great tutorial. I can honestly say I have never seen this one before done this way. Thank you so much.
ReplyDeleteI'd like to make this block for a quilt block swap. It has to be 12 1/2 inches square. What size is your block? Thanks for creating it! It's really cute!!
ReplyDeleteGreat question! Let me do some figuring and I will get right back to you.
DeleteMy friend Terri just made a really cute version for a bee she's in. She said she started with 1.5" strips. One of her blocks, http://www.flickr.com/photos/61178098@N07/6904509437/in/pool-1672979@N25/
DeleteGreat tutorial Adrianne! Thanks :)
ReplyDelete